Explorer
Prologue
In the past year, Explorer has been a significant part of my work and a culmination of what I have learned during that time. It all started when we needed a navmesh for our sixth game project at TGA, and we wanted to use as few third-party libraries as possible. I took on the challenge since AI is one of my interests, and I had to ensure that it was moderately usable and worked well for the game project. To make it unique, I decided to take my approach to a navmesh without looking at others for help and "winging it.".
Phase one of Map
When I started this process, I didn’t know much about what a navmesh is, I just knew that it was a way for AI to move around in the level of a game. With this in mind, I thought that it might be a good place to start with just turning one mesh into a navmesh. Just doing this was simple enough that I just needed to get the triangles from the mesh data of the mesh, and if two triangles had the same edges then they would be neighbors. And with this method, I quickly was able to make a very basic navmesh in one mesh that could pathfind on
(see video below).
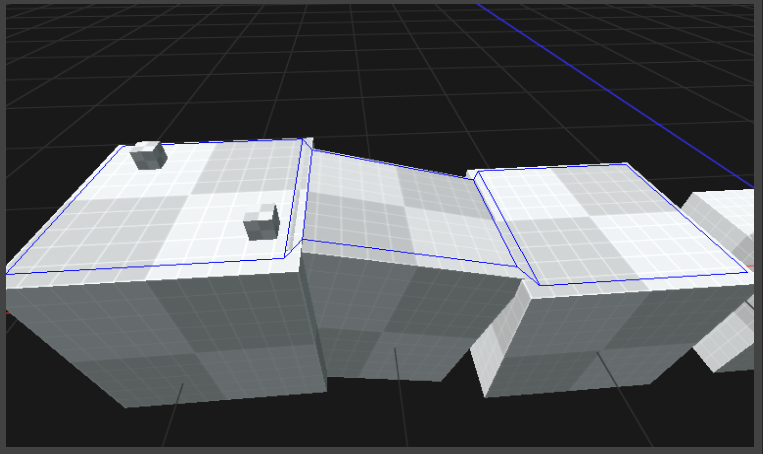
I started exploring ways to improve the basic navmesh system I created, which was usable but not very customizable in the long term. The issue was that creating a new mesh was necessary each time the level designers wanted to make changes to the level. To address this, I thought of connecting meshes so that the designers could customize the navmesh to fit the level. This meant focusing less on the triangles in the mesh and more on allowing designers to use default cubes and simply take the top vertices of the cubes to create a platform. I was then able to draw the outline of these platforms.
(outline in image below)

Once I had outlined the platforms on the meshes, my focus shifted to creating connections between them. To determine if platforms were adjacent to each other, I checked if the lines of their sides were facing each other. If they were, I extracted the points from both lines and created a new platform. Getting these connectors to work meant that the level designers could start using them to create walkable areas in the game.
(connectors in image below)
During the development process, I realized that the previous approach was limiting for the designers, so I decided to introduce another shape that they could use. After much consideration, I added triangles to the navmesh system, and it worked surprisingly well. Furthermore, I fixed the system so that the designers could add connections in the middle of platform edges, regardless of their width. With these improvements, the designers had more flexibility to create complex and varied levels.
(triangles and edge connectors in video below)
This concludes the first phase of Map and overall i thought that it went well, we were able to start testing the navmesh very early.
Phase two of Map
For our seventh project, I aimed to improve the user-friendliness of the navmesh. To achieve this, I studied how Unity creates a navmesh using obstacles and surfaces as separate objects in the world. While the surfaces would remain the same as before, I needed to add obstacles which are essentially negative surfaces to ensure the navmesh builds around them.
My initial approach was to identify the intersection points where the obstacles collide with the surfaces and create points on these intersections. I then used Delaunay triangulation to triangulate the surface points and intersection points. I chose Delaunay triangulation as it was easy to implement and generated visually pleasing triangulations.
(Triangulation of surface and intersection points)

Although it was a good start, I still needed to remove the triangles inside the obstacles. To achieve this, I triangulated the obstacle intersection points and checked if any of the triangles were inside the obstacle triangles. Once I had completed this step, I implemented simple pathfinding to test if the method was successful, and it indeed worked.
(Middle triangle pathfinding)
After connecting different surfaces using the same method as in the previous project, I encountered some issues as I needed to ensure that the surfaces remained triangulated. After some back and forth, I managed to resolve these issues successfully. Additionally, I added an offset for the obstacles to prevent enemies from hugging the walls. To visualize this process, I decided to use a mesh.
(Connected surfaces and offseted obstacles represented by a mesh)
Phase three of Map
Phase three is still in progress but i have decided to create a voxelised navmesh since it is more industy standard and i used recast as a refrence, this is also my specialisation and you can read more about it on my spesialication page.